How to Use Google Sheets as a CMS for Your Webflow Website (Without Zapier)
How to Use Google Sheets as a CMS for Your Webflow Website (Without Zapier)

Allen Jones
If you build websites in Webflow for clients, you have probably had this conversation at least once.
You finish the site. It looks great. The client is happy. Then they ask: "How do I update the menu?" or "Can I add a new team member myself?"
You explain Webflow CMS. You walk them through it. They nod along. Then two weeks later, you get a message: "Can you just update it for me? I can't figure out the CMS."
This is not a client problem. It is a workflow problem. And the answer, most Webflow designers reach for syncing Google Sheets to Webflow CMS via Zapier — turns out to create a different set of headaches that are arguably worse than the original one.
This post covers why the Zapier approach breaks down, what the real pain points are, and how to use Google Sheets as a live CMS for your Webflow site without touching Zapier at all.
The Real Pain Points Webflow Designers Face With Google Sheets and CMS
Before getting to the solution, it is worth naming the problems clearly because the Webflow forum and Reddit communities are full of people running into the same walls.
Pain Point 1: Clients Simply Will Not Learn Webflow CMS
This is the most common frustration, and it is completely understandable from the client's side. Most small business owners already live in Google Sheets. They manage their inventory there, their staff roster, their menu, and their event list. Asking them to learn a new interface just to update a row of data is a genuine barrier that most of them quietly abandon.
The result is that content goes stale. A menu shows items that are no longer available. A team page shows people who left the company. An event listing shows events that have already happened. And the client either pays you to make every update manually or just lives with outdated content.
Pain Point 2: The Zapier Sync Creates More Problems Than It Solves
The natural workaround Webflow designers reach for is Zapier or Make. Connect Google Sheets to Webflow CMS, trigger a sync when a row changes, and the CMS updates automatically.
In practice, this breaks down in several ways that users report consistently on the Webflow forum.
The slug problem is the most common. Webflow CMS requires a slug for every item and generates it automatically. When Zapier tries to create or update items, it cannot easily match an existing Webflow CMS item to a Google Sheets row, which means it often creates duplicates instead of updating the correct item.
As one Webflow forum user described it: "I keep running into issues comparing an existing item on the Webflow database to update instead of just creating a new one."
Rate limits add another layer of fragility. Webflow's API allows 60 requests per minute with batches capped at 100 items per call. For sites with frequent updates or large datasets, this means delays, failed syncs, and content that is out of date, even when the workflow is technically working.
The deprecation of Webflow API v1 in March 2025 also broke many existing Zapier and Make integrations, leaving designers scrambling to rebuild workflows that had been running for years.
Pain Point 3: The Webflow CMS Item Limits Hit Harder Than Expected
Webflow's CMS plan allows 2,000 items per site. The Business Plan caps at 10,000 items with the option to purchase up to 20,000. For a restaurant with a large menu, a directory site, a job board, or any content-heavy project, these limits become a real constraint fast.
Workarounds like splitting content across multiple collections or setting up reverse proxies works, but add significant complexity to what should be a simple content management task.
Google Sheets has none of these limits. A single spreadsheet can hold hundreds of thousands of rows with no additional cost.
Pain Point 4: The Default Google Sheets Embed Is Unusable
The simplest approach using Webflow's Embed element to drop in a Google Sheets iframe, it produces results that designers consistently described as broken.
As one Webflow forum user put it: "I need to embed a Google Sheet, but after inserting the code, I have no control over the size. It defaults to a tiny square."
The native iframe embed shows the full Google Sheets interface, including tabs, header rows, and the Google branding. It is not responsive, it cannot be styled to match your site design, and it looks nothing like a purpose-built website element.
Pain Point 5: Custom Code Solutions Are Fragile and Hard to Hand Off
Some designers solve the problem with custom JavaScript that calls the Google Sheets API directly. This works technically, but introduces a new problem: the client now has a custom-coded integration that requires an API key, a specific sheet format, and code that lives somewhere in the Webflow custom code panel.
When something breaks, which it will, the client calls you. When you want to hand the project off to another designer, you have to explain the entire custom integration. The maintenance burden never goes away.
The Better Approach: Skip the CMS Sync and Use a Live Widget Instead
Here is the insight that changes how this problem feels: you do not need to sync Google Sheets to Webflow CMS at all.
The reason people try to sync is that Webflow CMS is the only way to show dynamic content in Webflow, or so it seems. But there is a simpler path. Instead of pushing your sheet data into Webflow CMS, you render it directly on the page using an embeddable widget that pulls live data from the sheet on every page load.
No sync. No Zapier. No slug conflicts. No item limits. No duplicate entries.
The client updates the Google Sheet. The page reflects the change immediately. That is it.
How to Set This Up With SheetRocket
Sheetrocket is a tool that turns any Google Sheet into a live REST API and an embeddable widget. The widget is what matters for the Webflow use case.
Here is the exact process.
Step 1: Connect Your Google Sheet
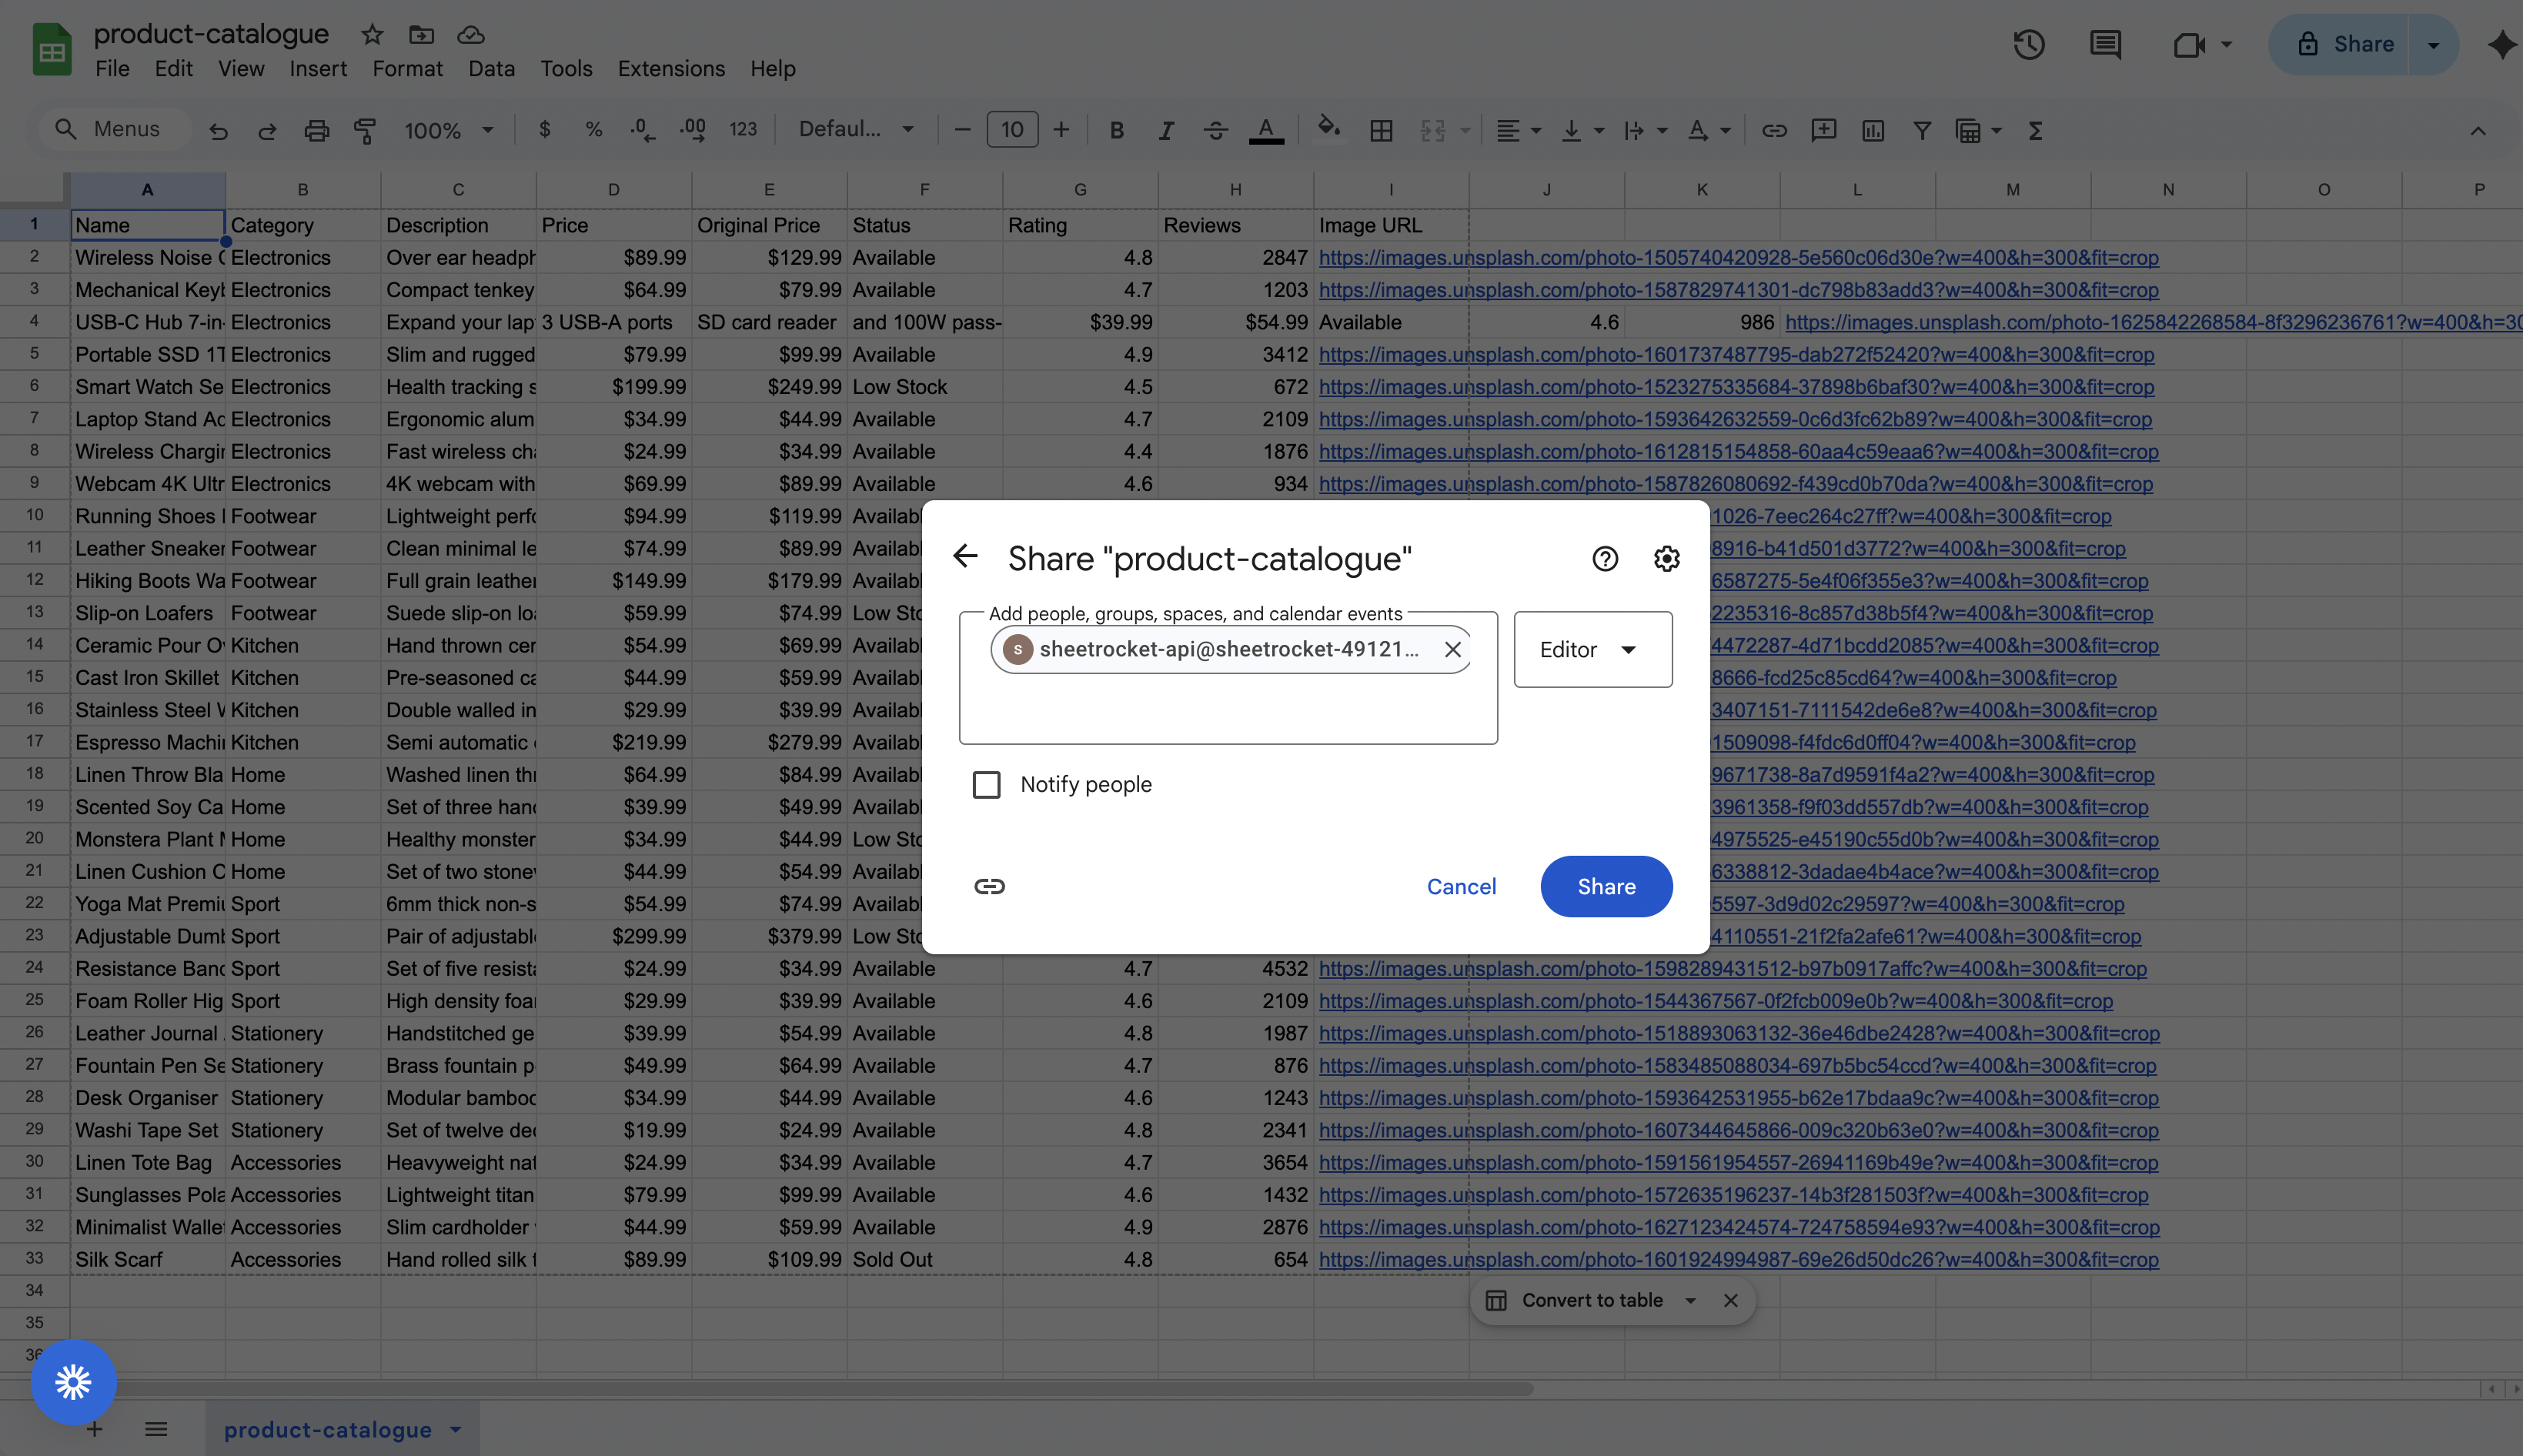
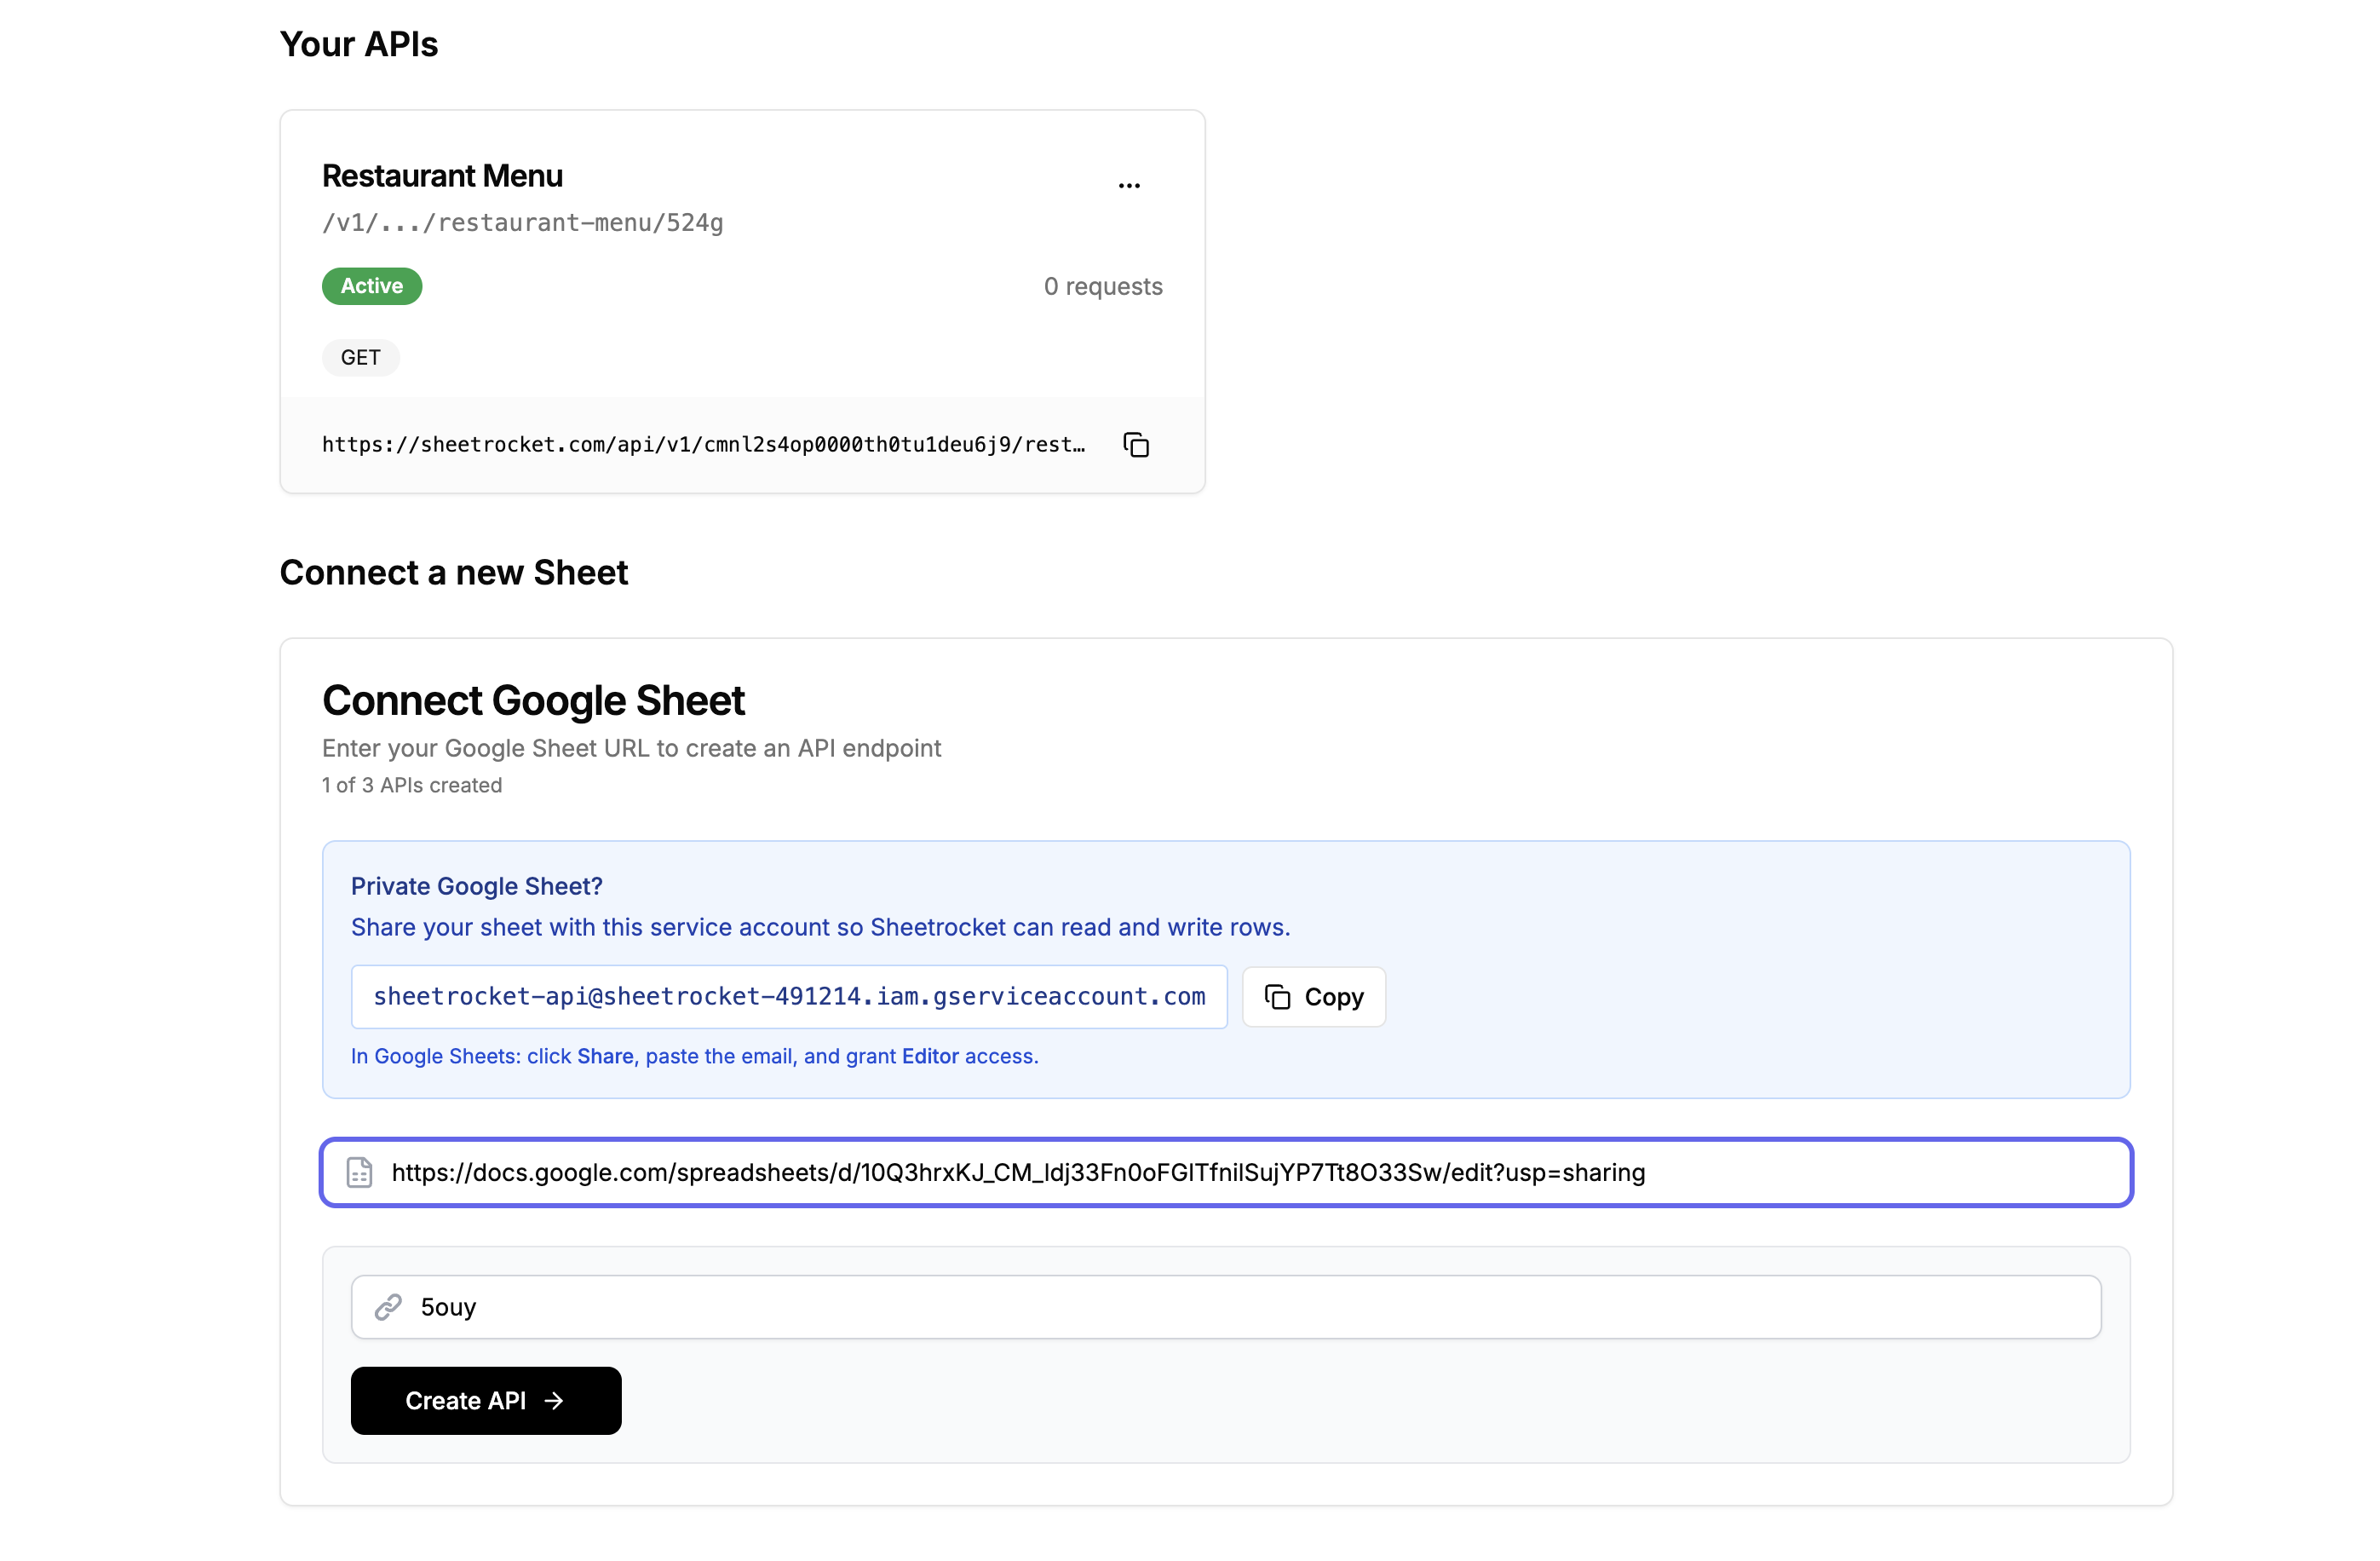
Sign up at (sheetrocket.com)[sheetrocket.com] and sign in with Google. Paste your Google Sheet URL into the dashboard. Sheetrocket connects to your sheet via a service account, which means your sheet stays private, and no OAuth consent screen appears for your clients.
Example Google Sheet:
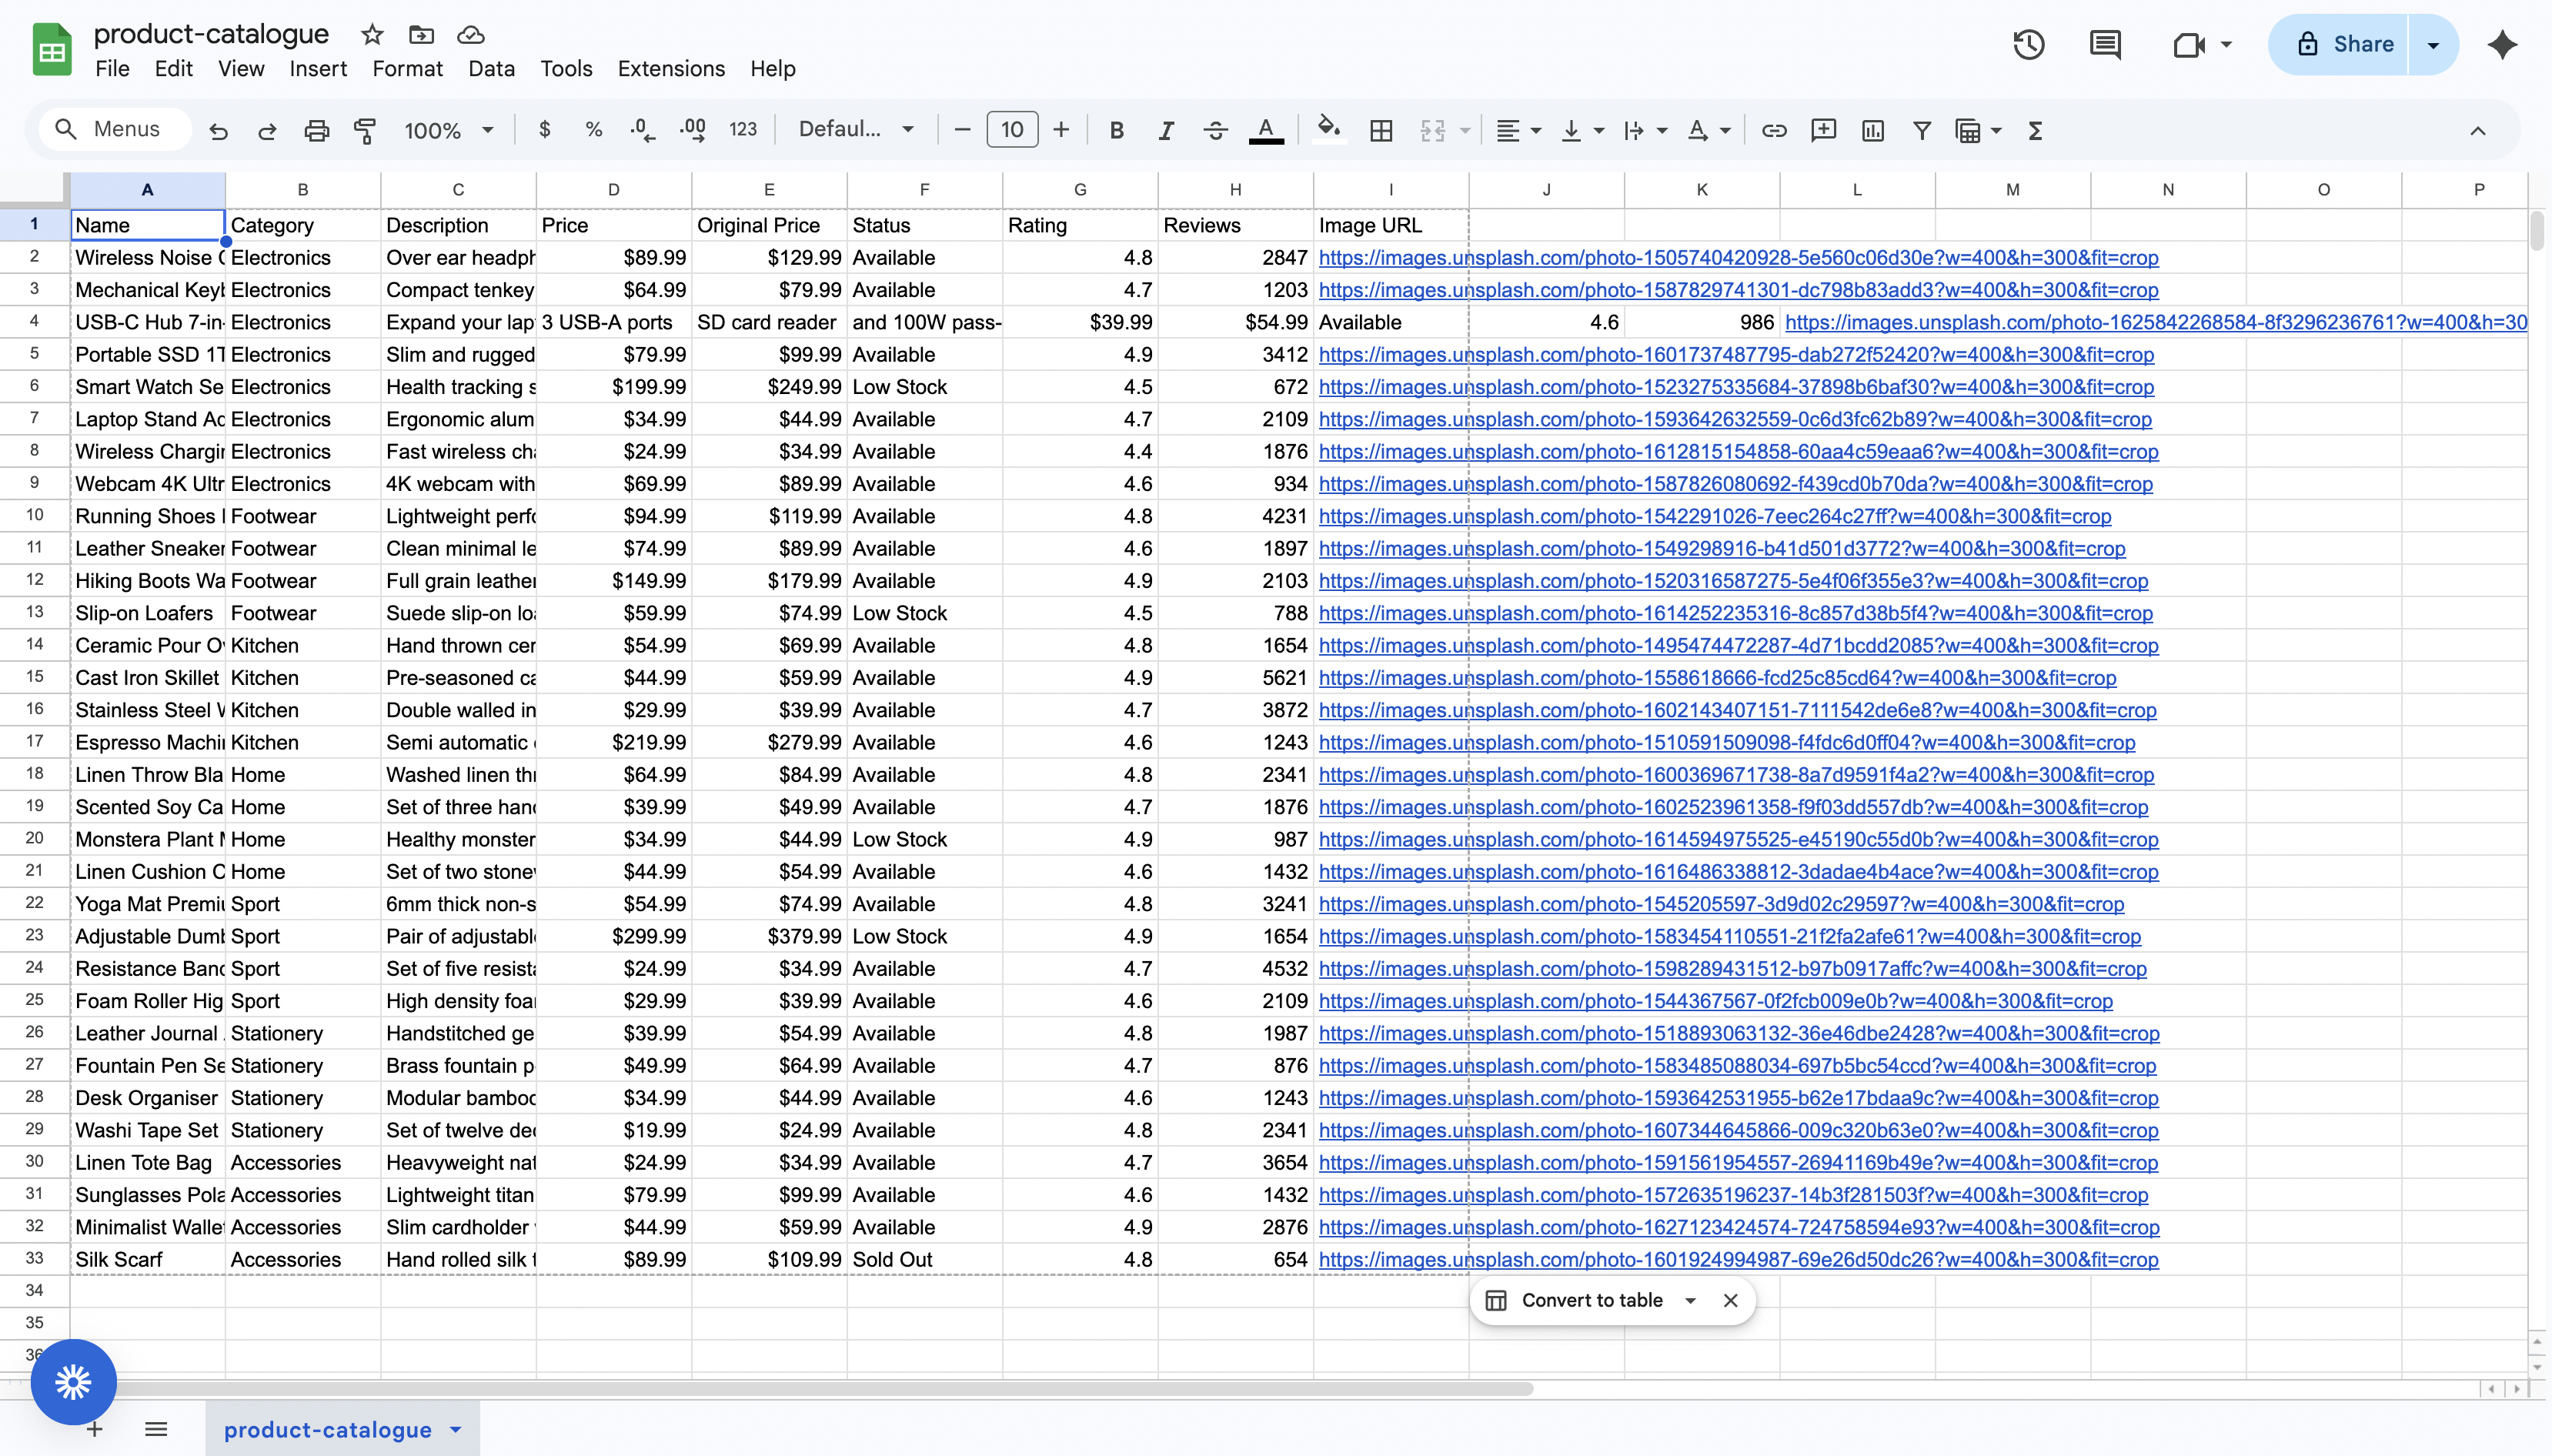
Share it with this service account email and copy your Google Sheet link Service account email:
Paste your Google Sheet URL, and Sheetrocket generates your API and widget configuration in seconds.
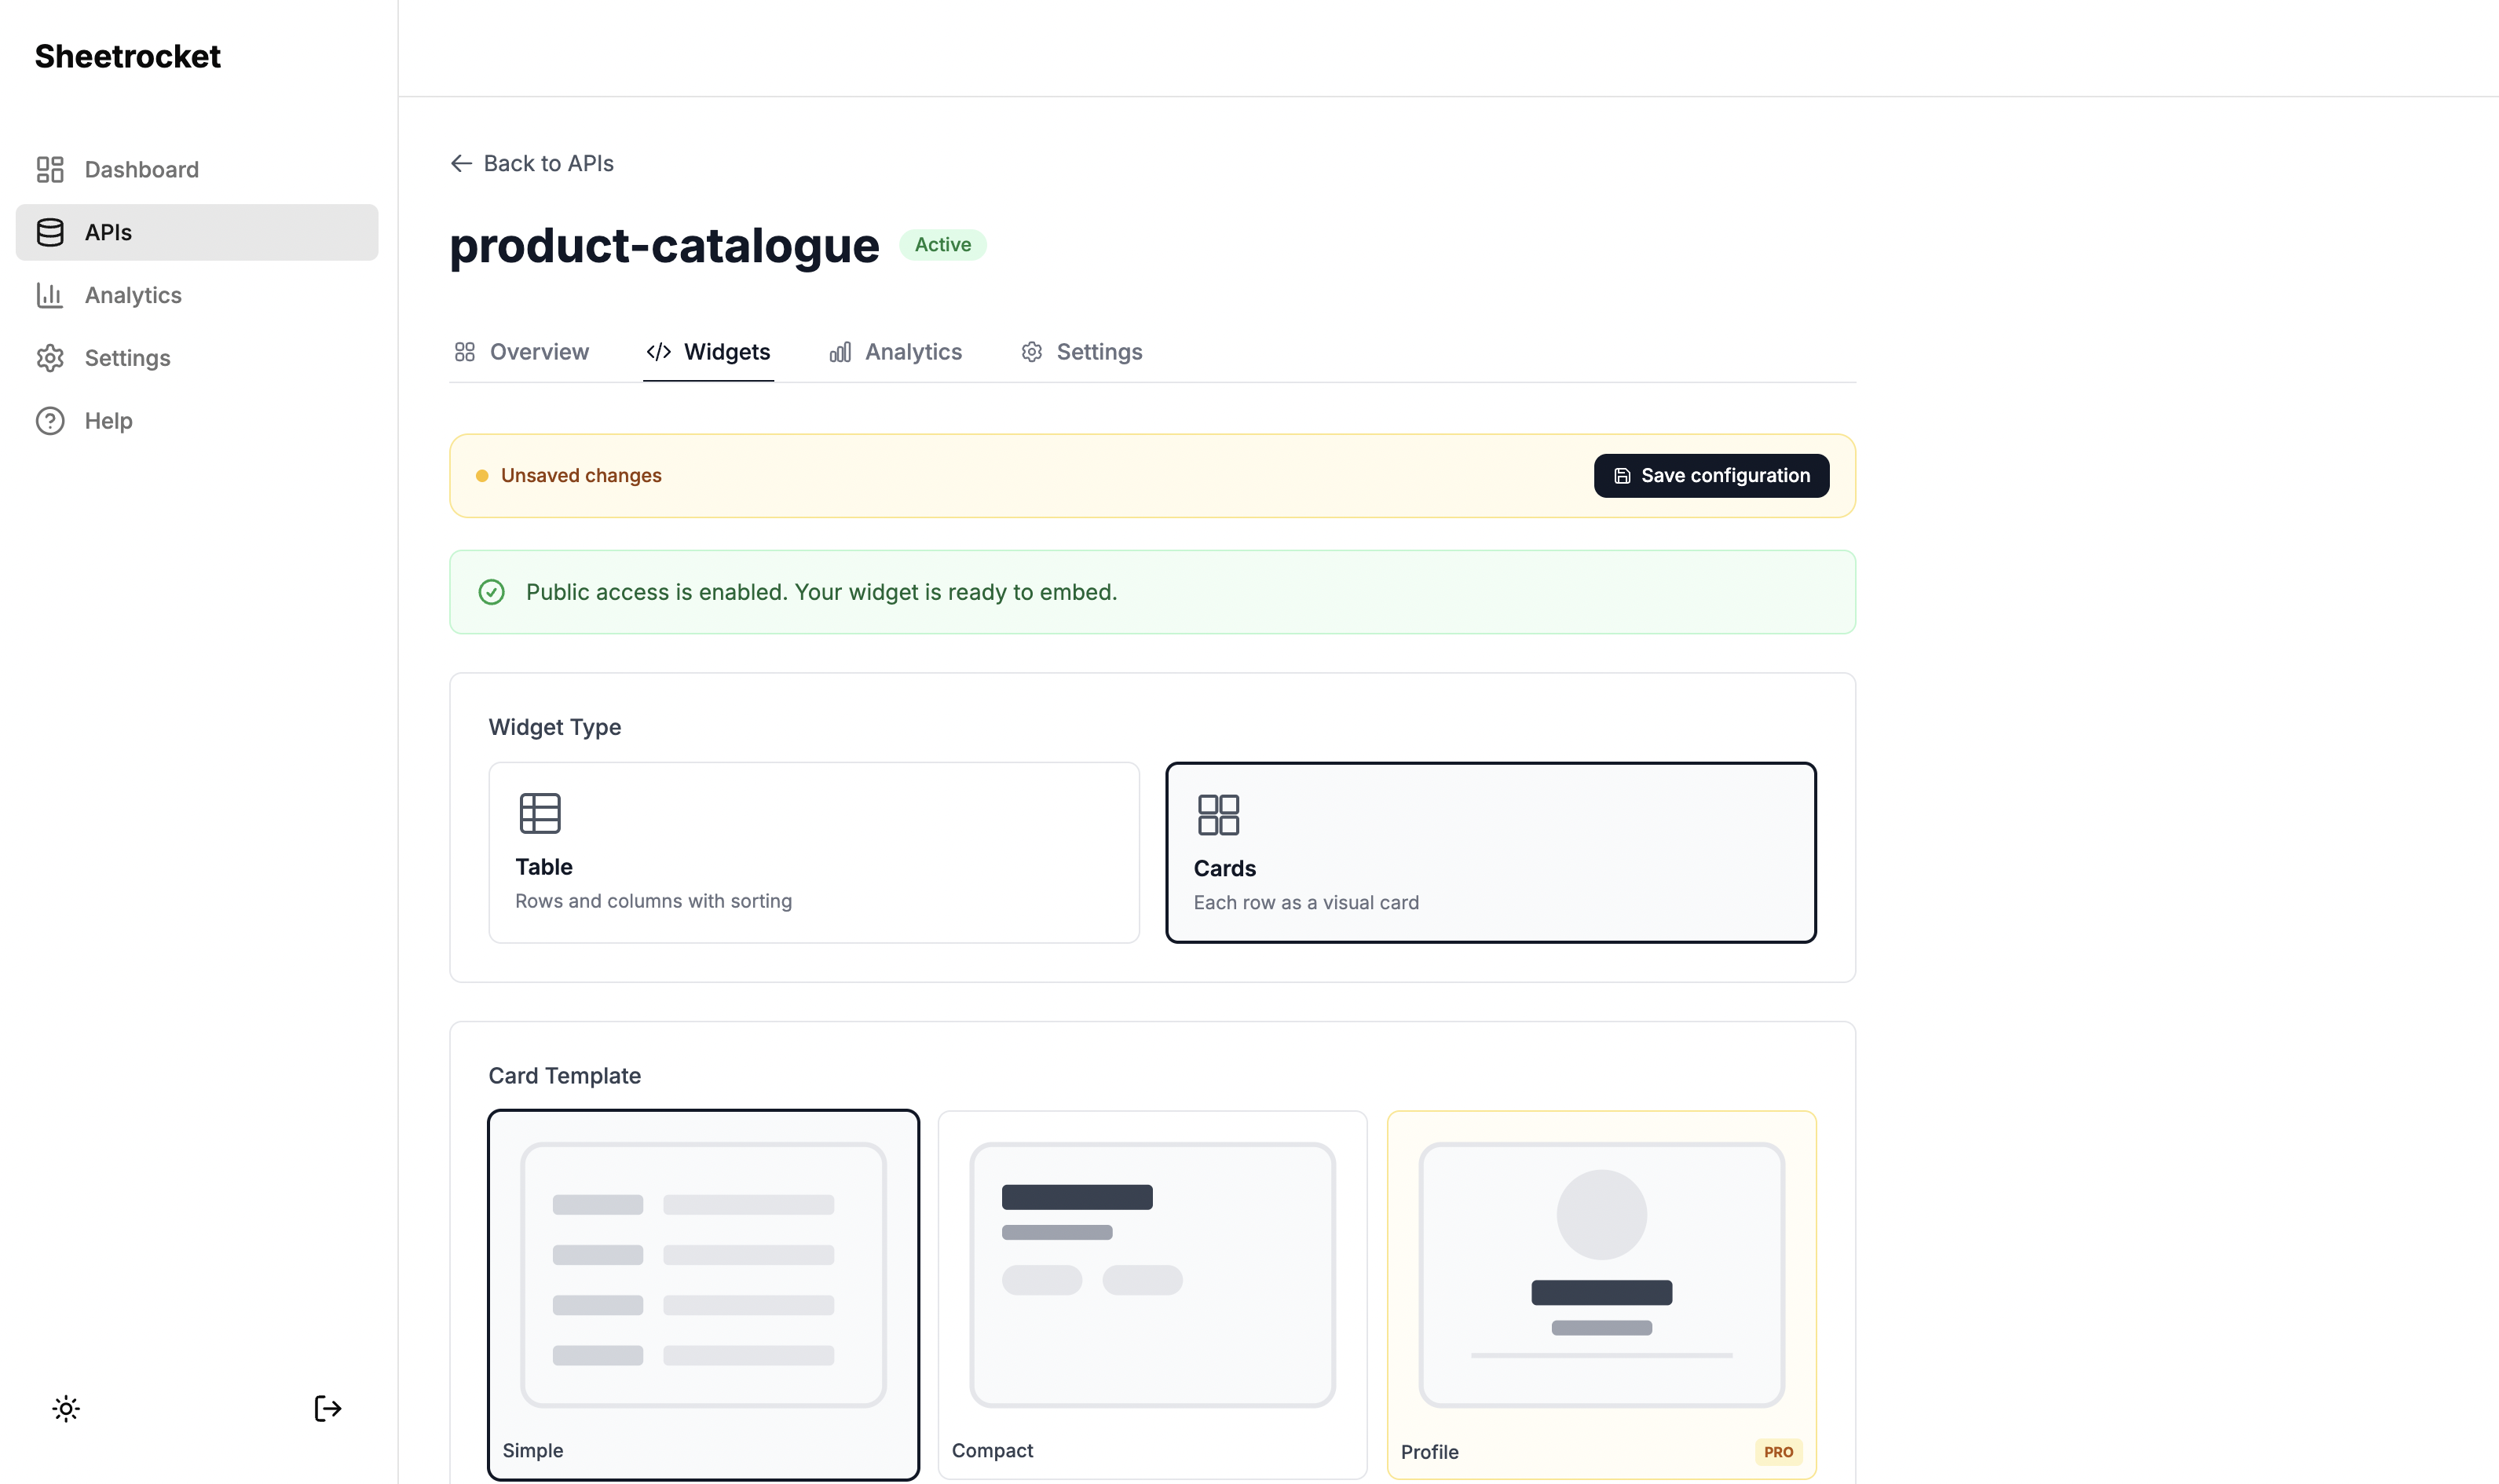
Step 2: Open the Widgets Tab
On the API details page, click the Widgets tab. This is where you configure what your embedded widget looks like and how it behaves.
You will see two layout options: Table and Cards. Choose Table if you want a traditional rows-and-columns layout. Choose Cards if you want each row displayed as a visual card.
The Widgets tab. Choose between a table or cards layout depending on your content type.
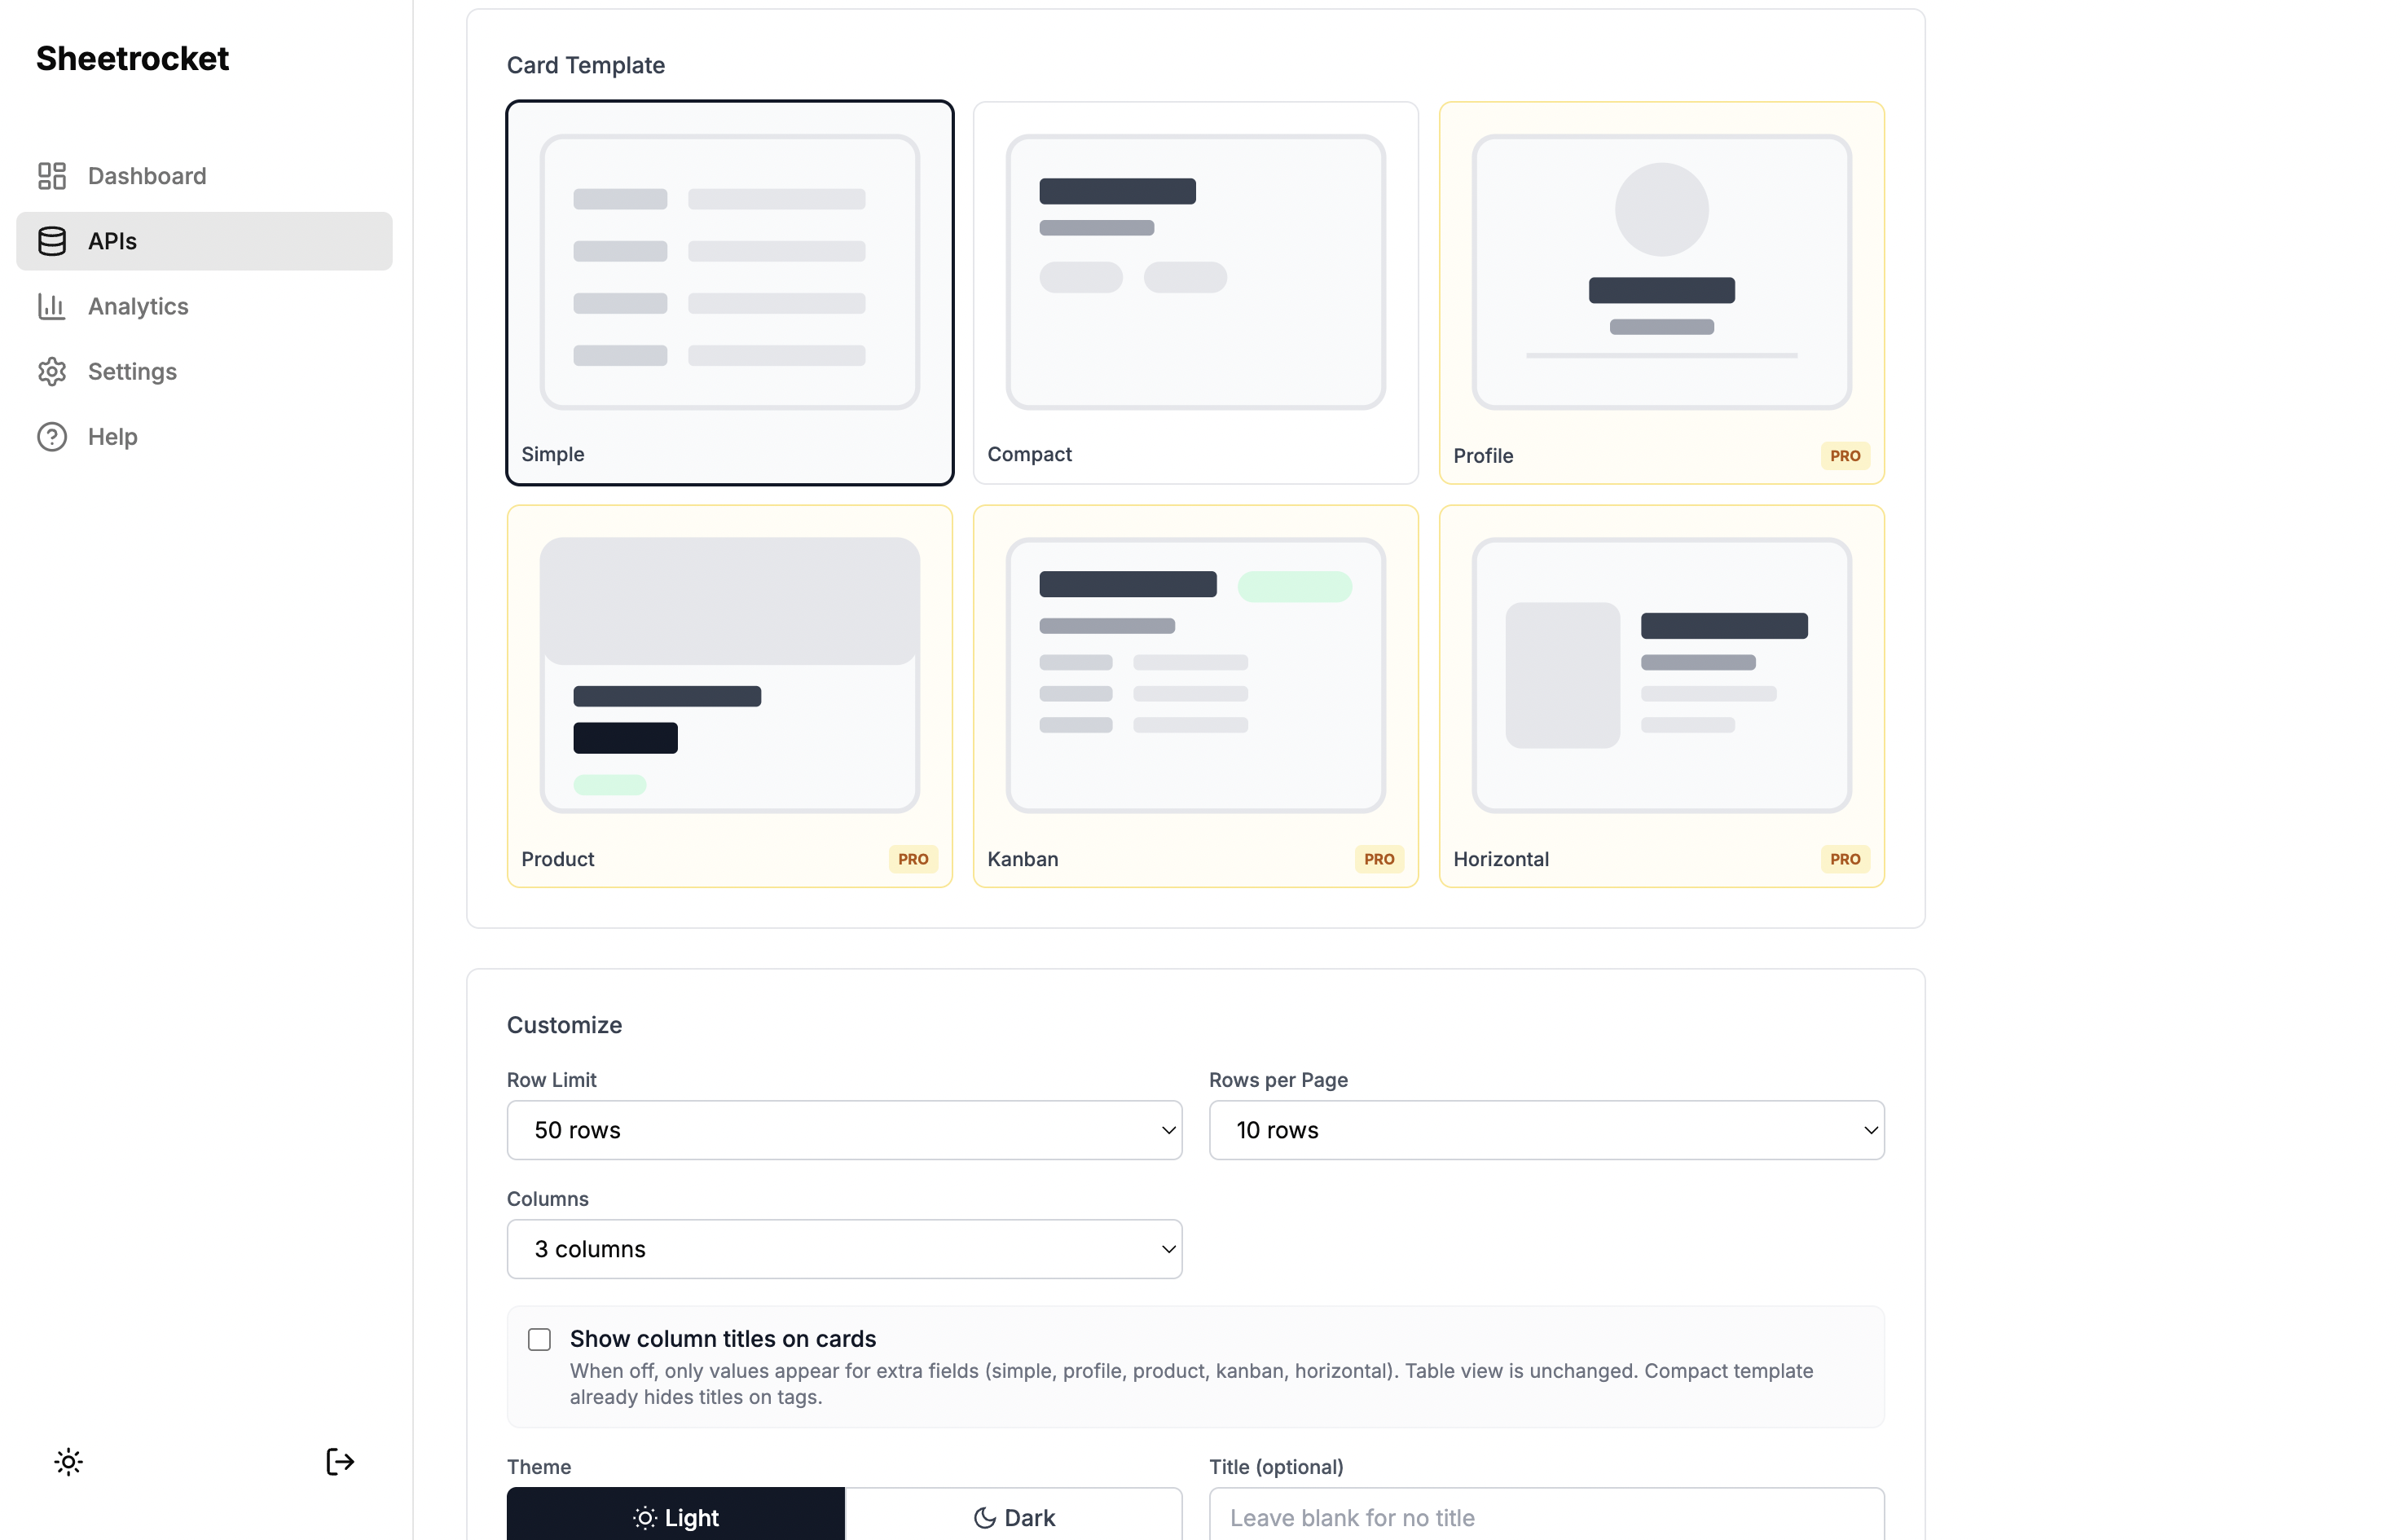
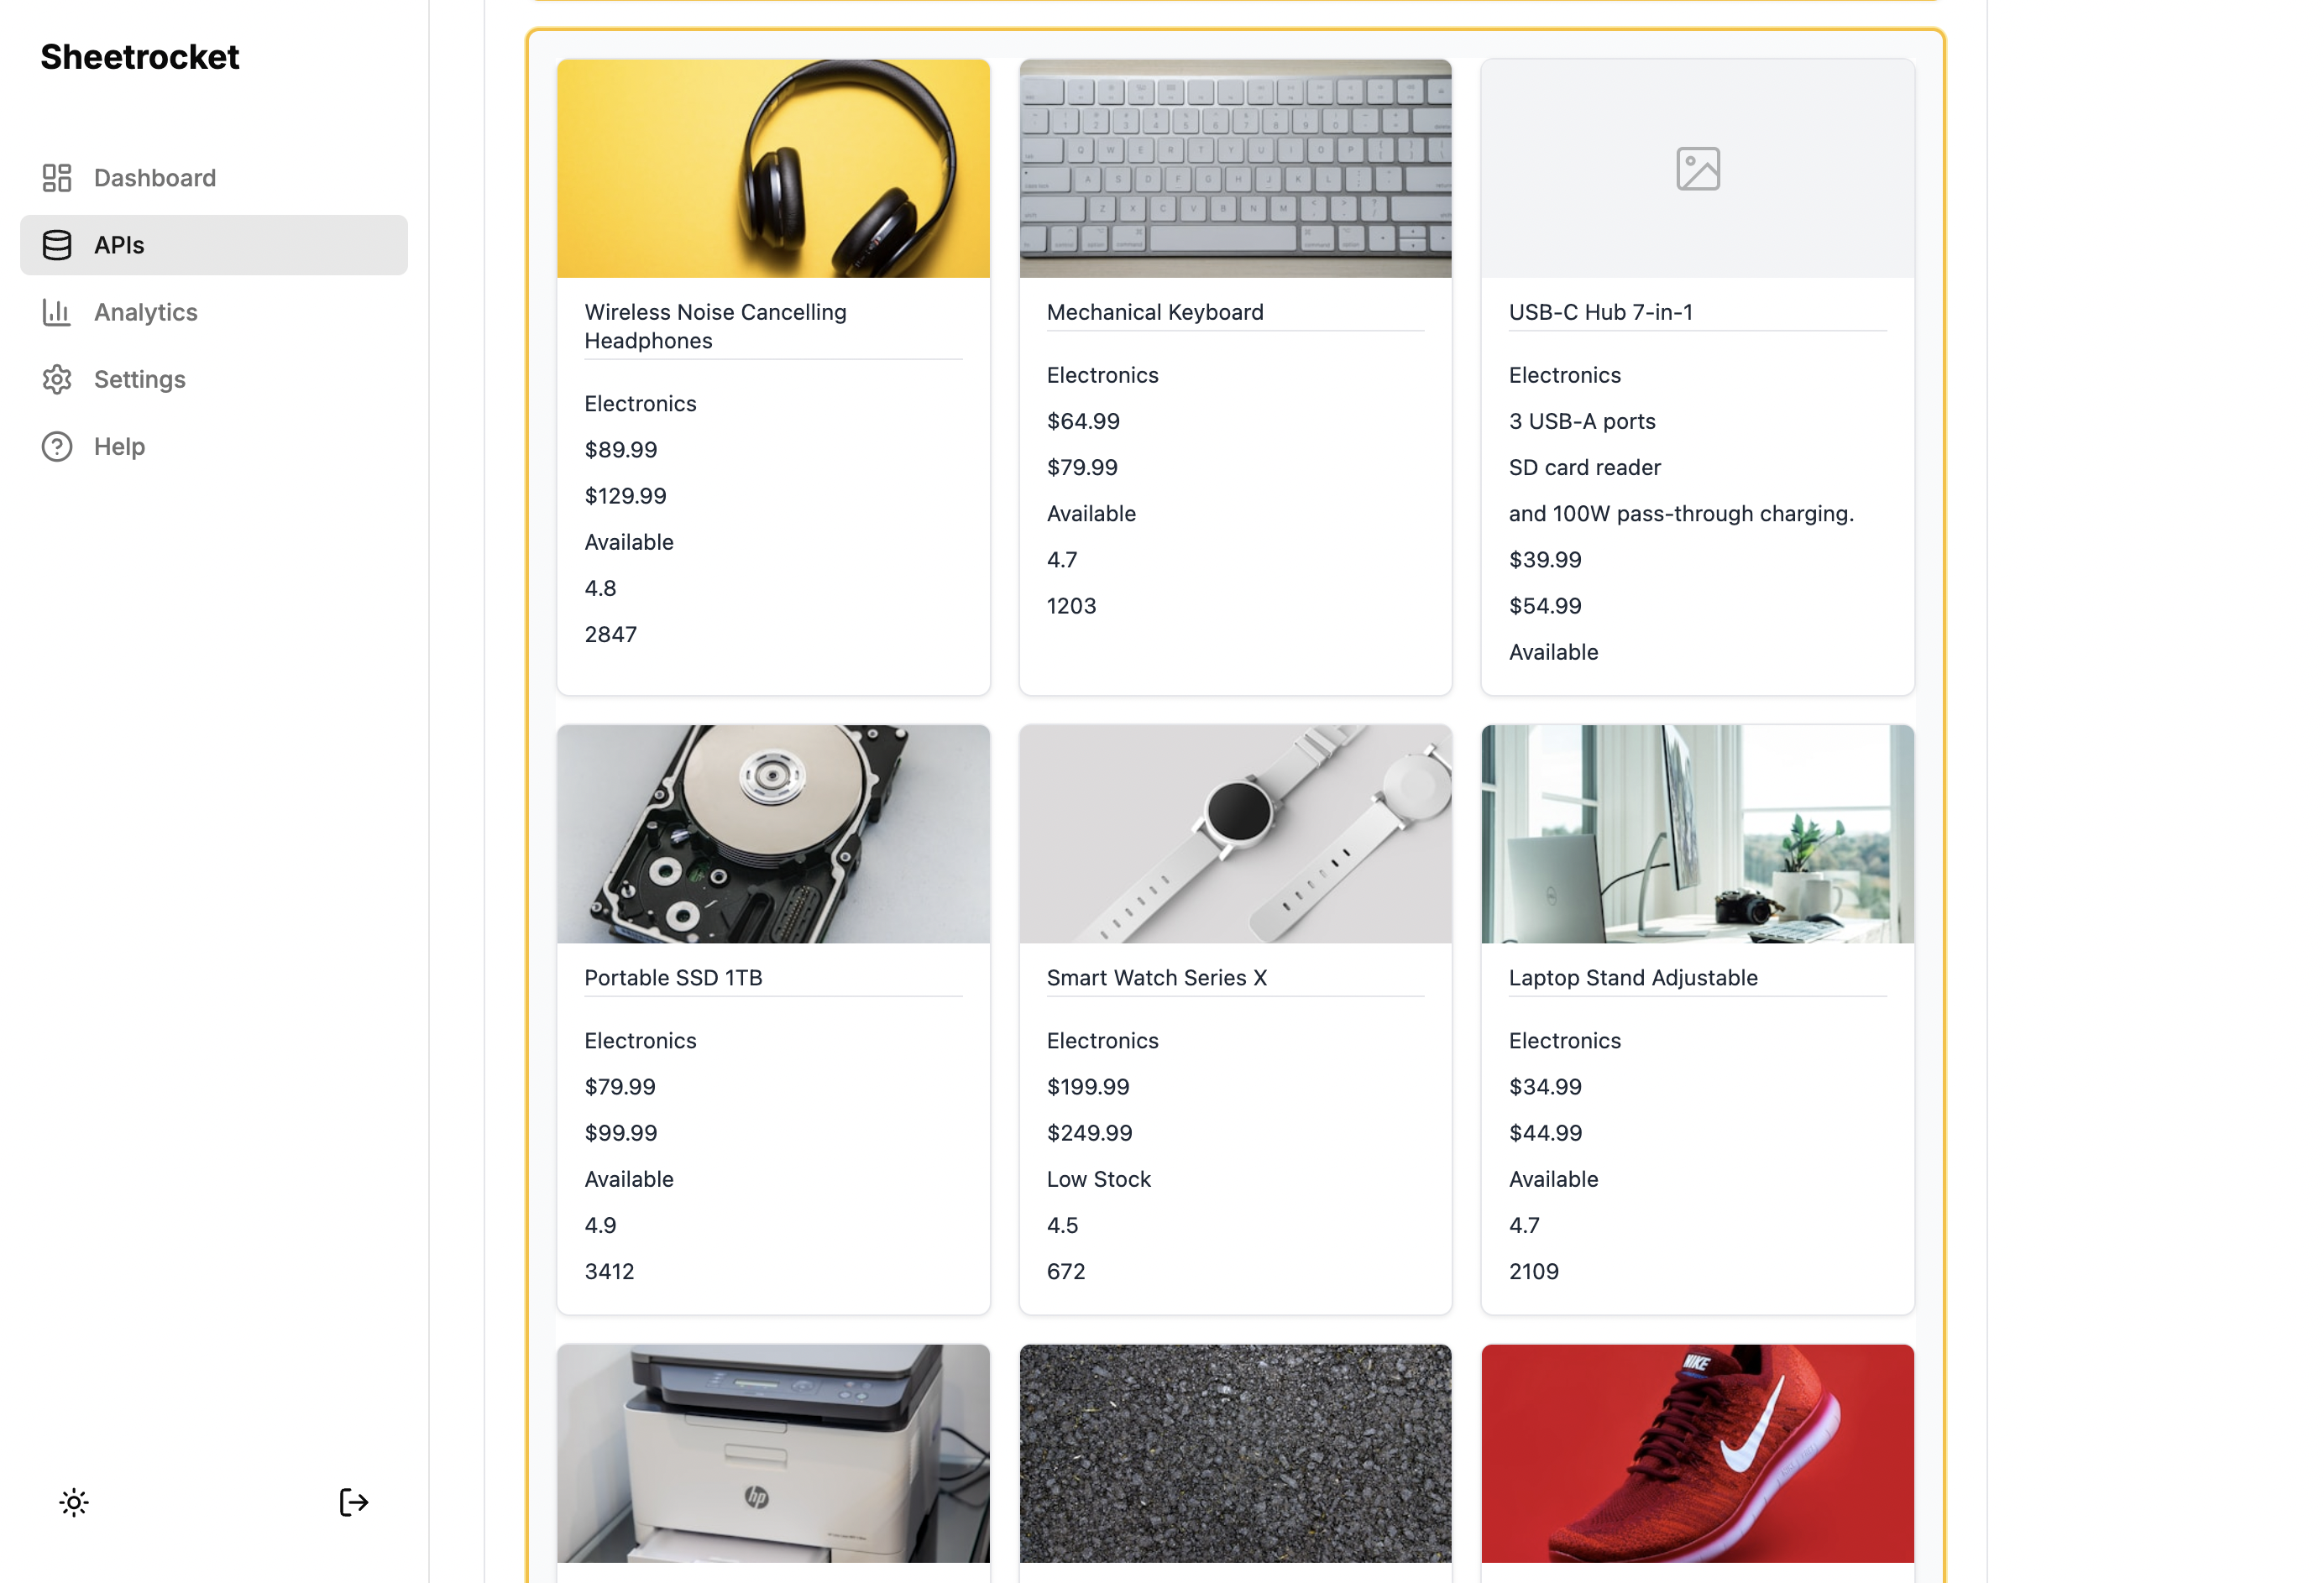
Step 3: Choose a Card Template (For Cards View)
If you choose Cards, SheetRocket gives you six card template designs to choose from:
Simple: Clean stacked fields. Works for any data type. Good for staff directories, resource lists, FAQs.
Compact: Two-column field grid. Good for dense datasets like price lists or inventory.
Profile: Large name with avatar image. Good for team pages, speaker directories, member rosters.
Product: Full-width image at top with title and price below. Good for restaurant menus, product catalogues, service offerings. If a row has no image URL the card renders cleanly without a broken placeholder.
Status: Color-coded status badge on each card. Green for active or available, yellow for pending, red for closed or sold, blue for featured. Good for job boards, real estate listings, event availability.
Horizontal: Image left, content right, stacked as a list. Good for blog post feeds, news listings, recipes.
Pick a card design. Each preview shows your actual layout so there are no surprises.
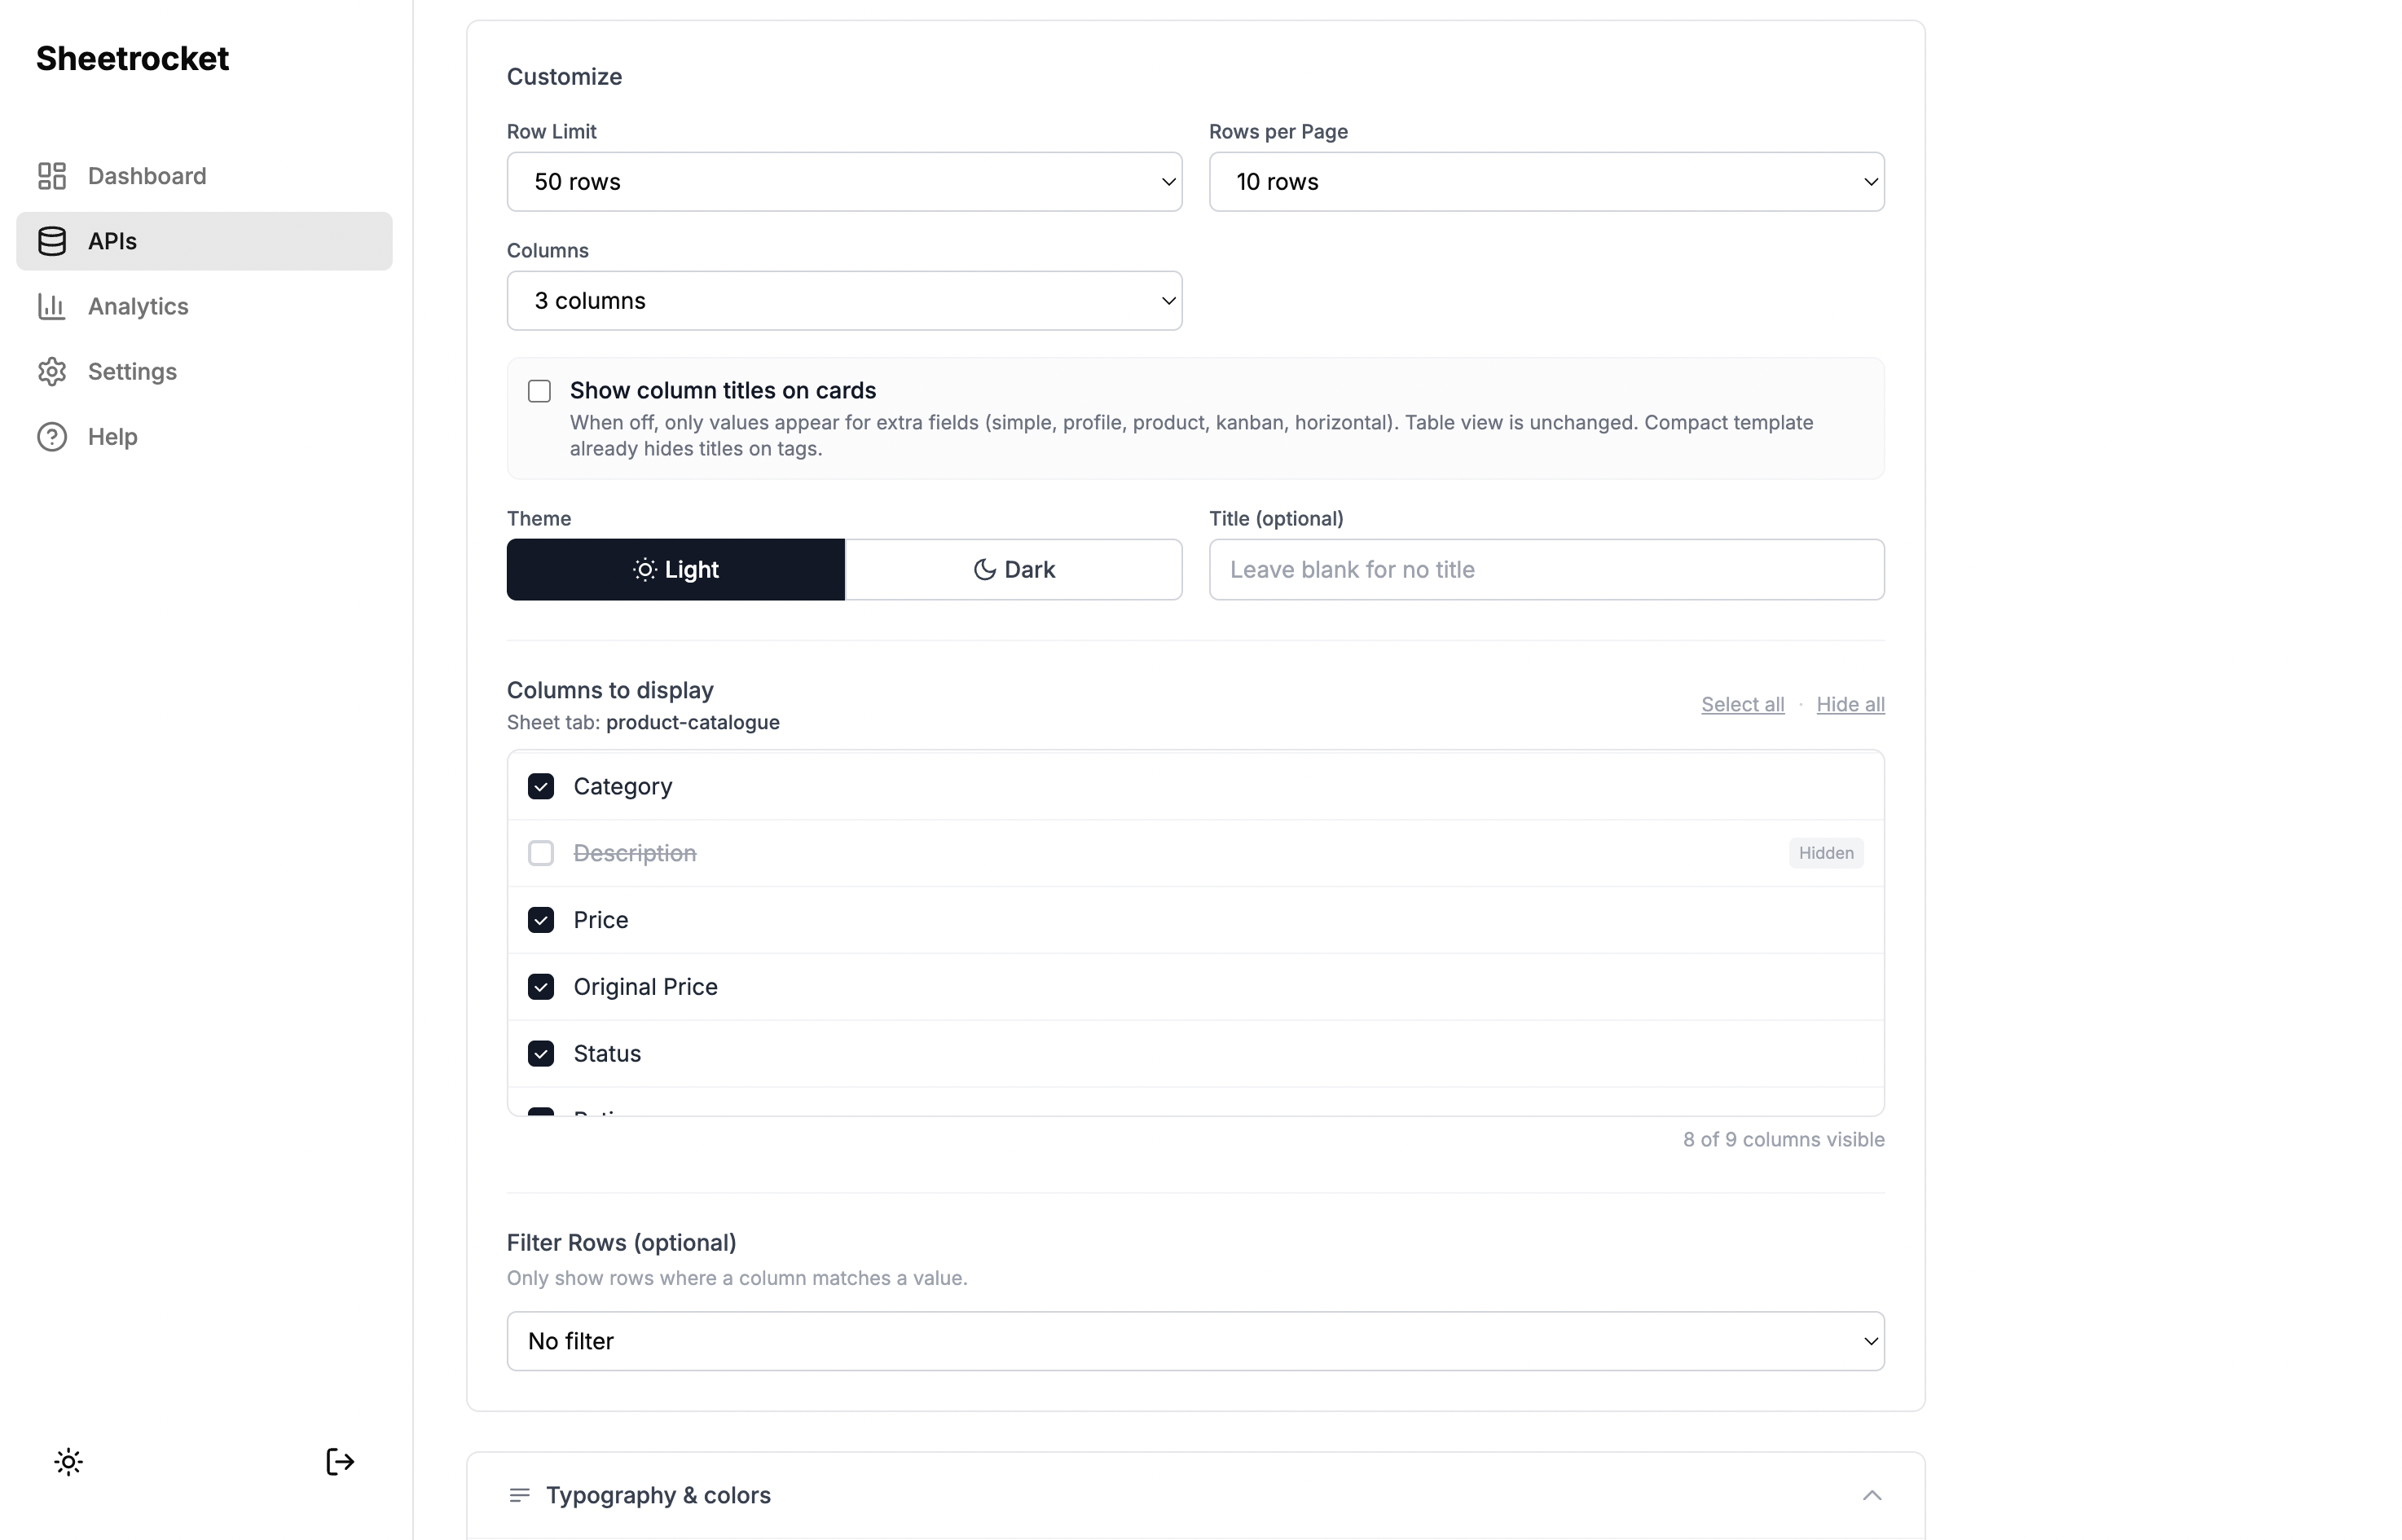
Step 4: Configure the Widget
After selecting your template, the customization panel gives you full control over what appears and how it looks.
Sheet Tab: Which tab of your spreadsheet to display.
Row Limit: How many rows to show in the widget.
Theme: Light or dark, to match your Webflow site design.
Title: An optional heading above the widget.
Column Visibility: A checkbox list of every column in your sheet. This is the feature that matters most for client work. If your sheet has internal columns like cost price, supplier name, or internal notes, you uncheck them here, and they are completely hidden. They are filtered server-side before the data ever leaves SheetRocket, so there is no risk of a visitor finding them by inspecting network requests.
Row Filter: Show only rows that match a condition. For a restaurant menu: show only rows where Status equals Available. For a job board: show only rows where Status equals Open. For an events page: show only rows where Date is not empty.
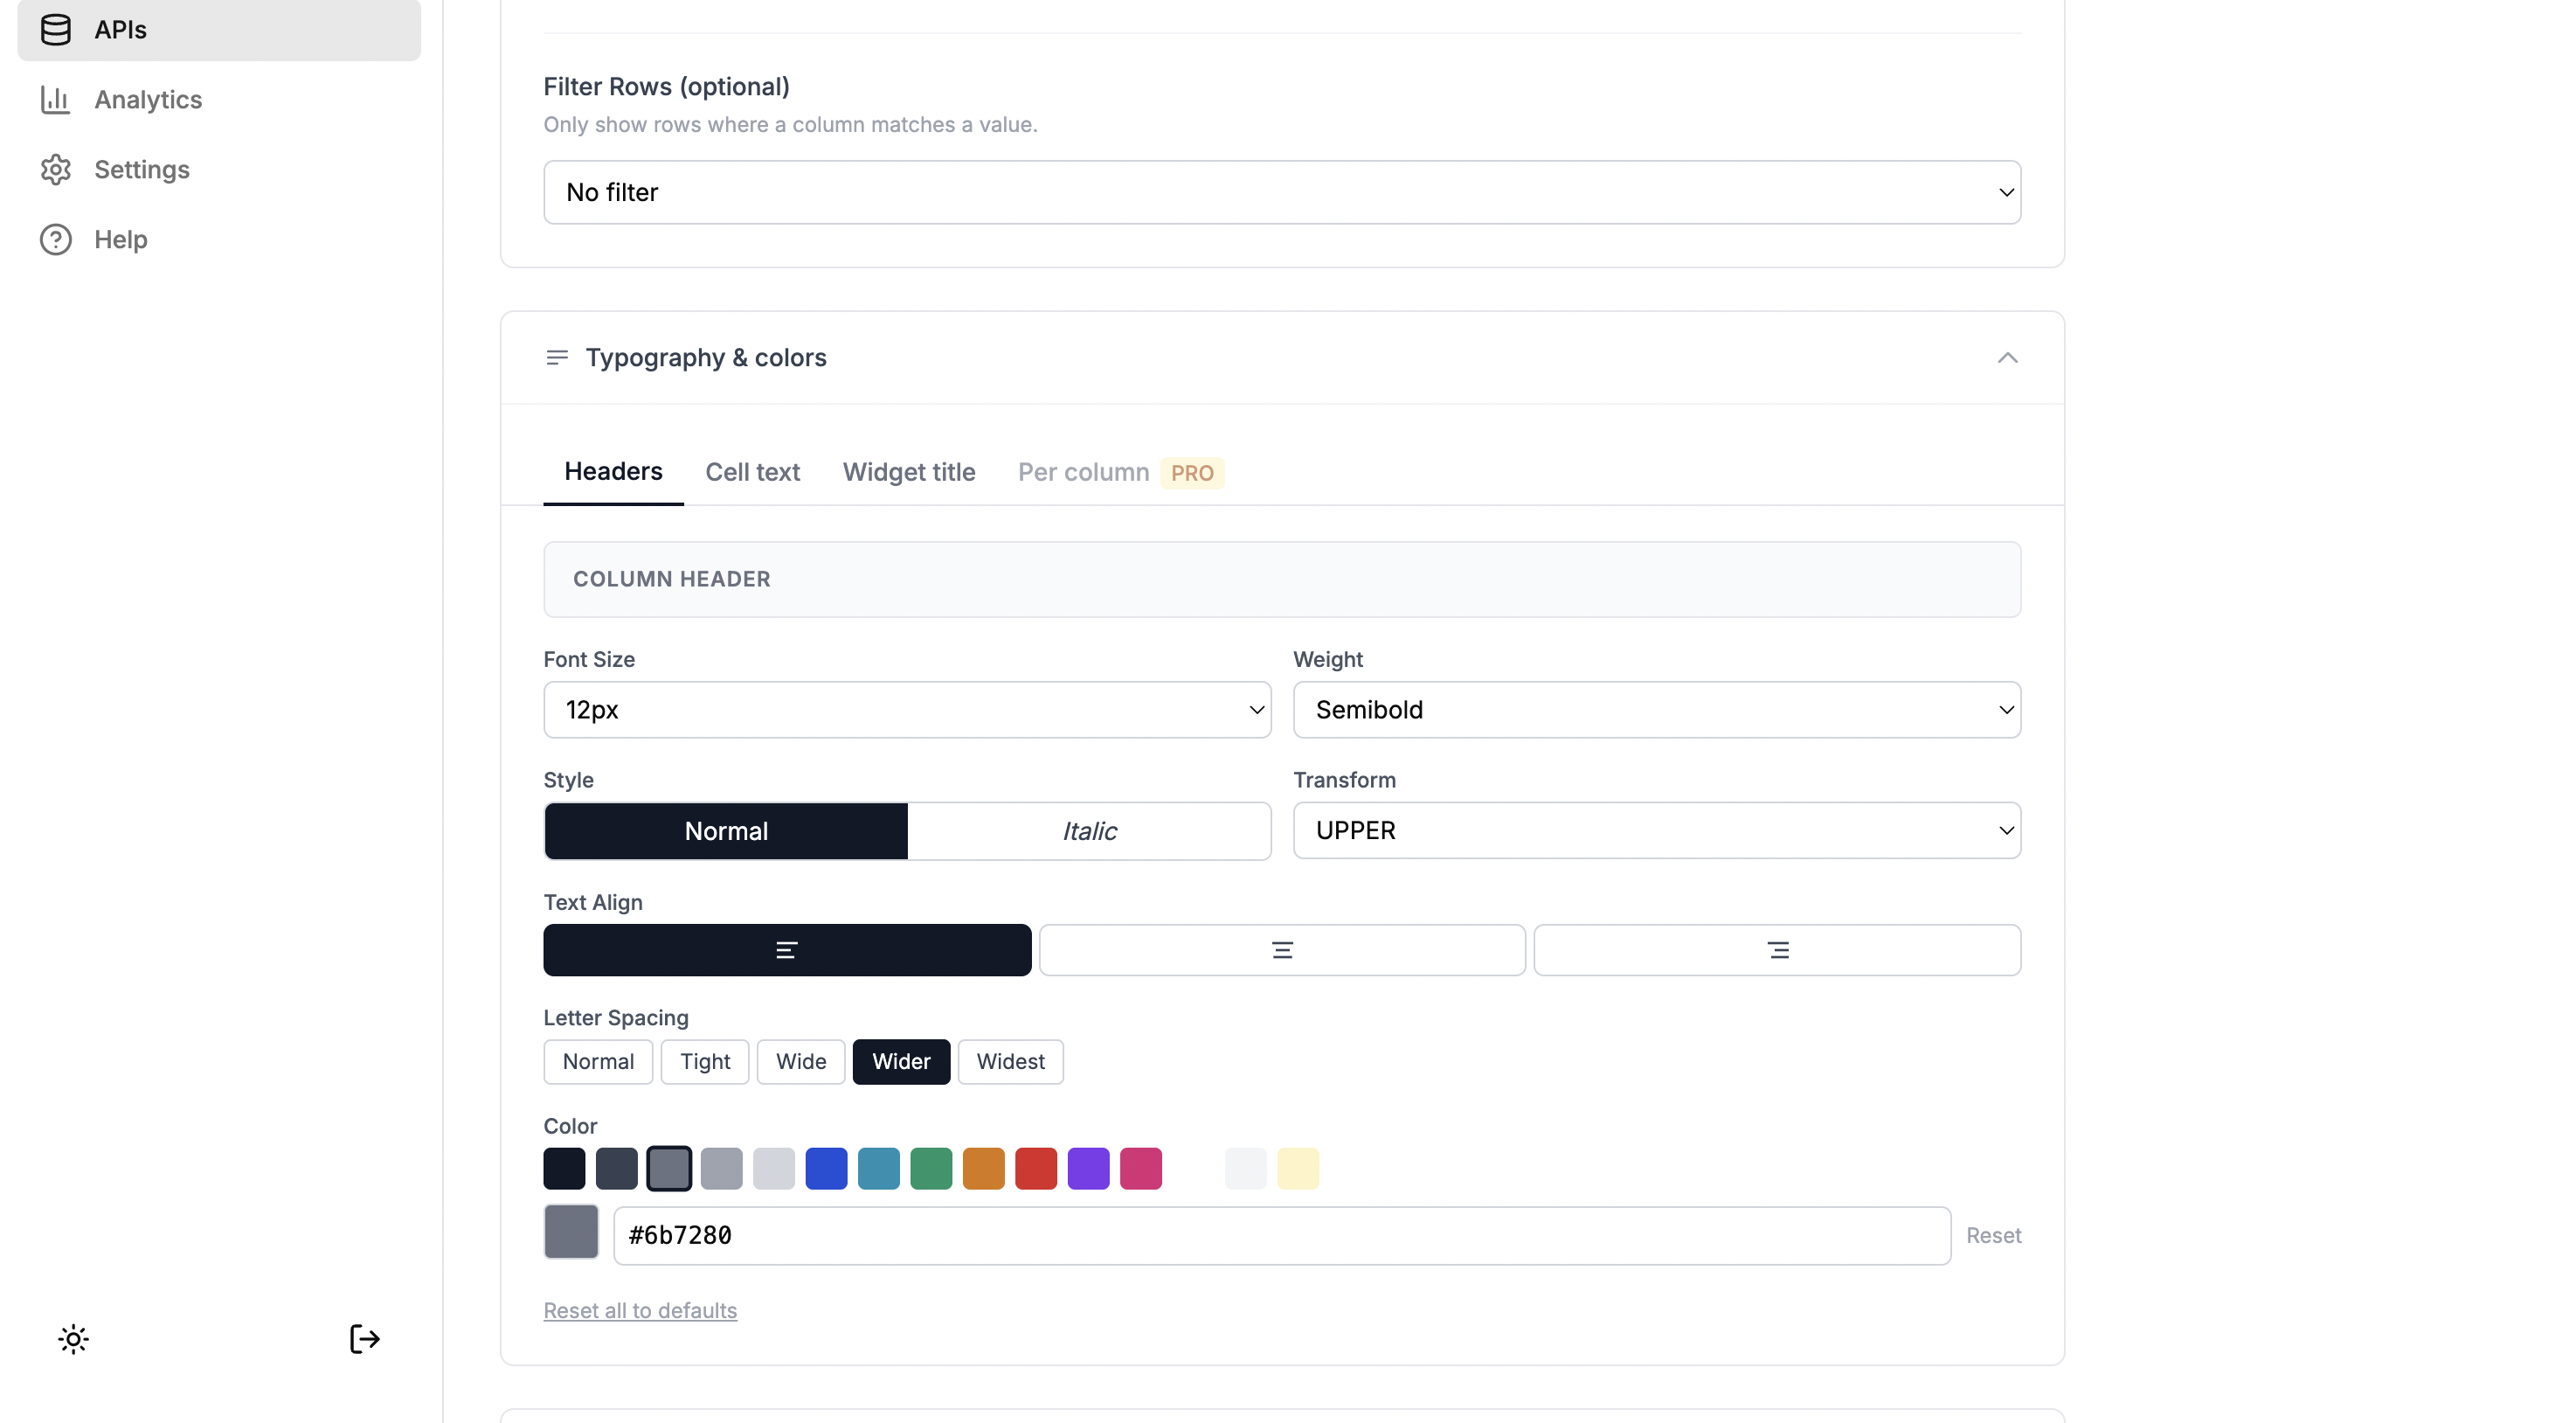
Typography: Customize font size, font weight, color, text alignment, and letter spacing for column headers and cell values independently. This is how you make the widget feels like part of your Webflow design rather than a generic embedded element.
Control exactly what appears. Column hiding keeps sensitive data private. Row filtering keeps content relevant.
Step 5: Copy the Embed Code
When your widget is configured, SheetRocket generates an embed code that updates in real time as you adjust settings. For a restaurant menu, it might look like this:
<div data-sheetrocket="your-sheet-id">
</div>
<script src="https://sheetrocket.com/widget.js" async></script>
Copy that code. Go to your Webflow project. Add an Embed element wherever you want the widget to appear. Paste the code in and publish.
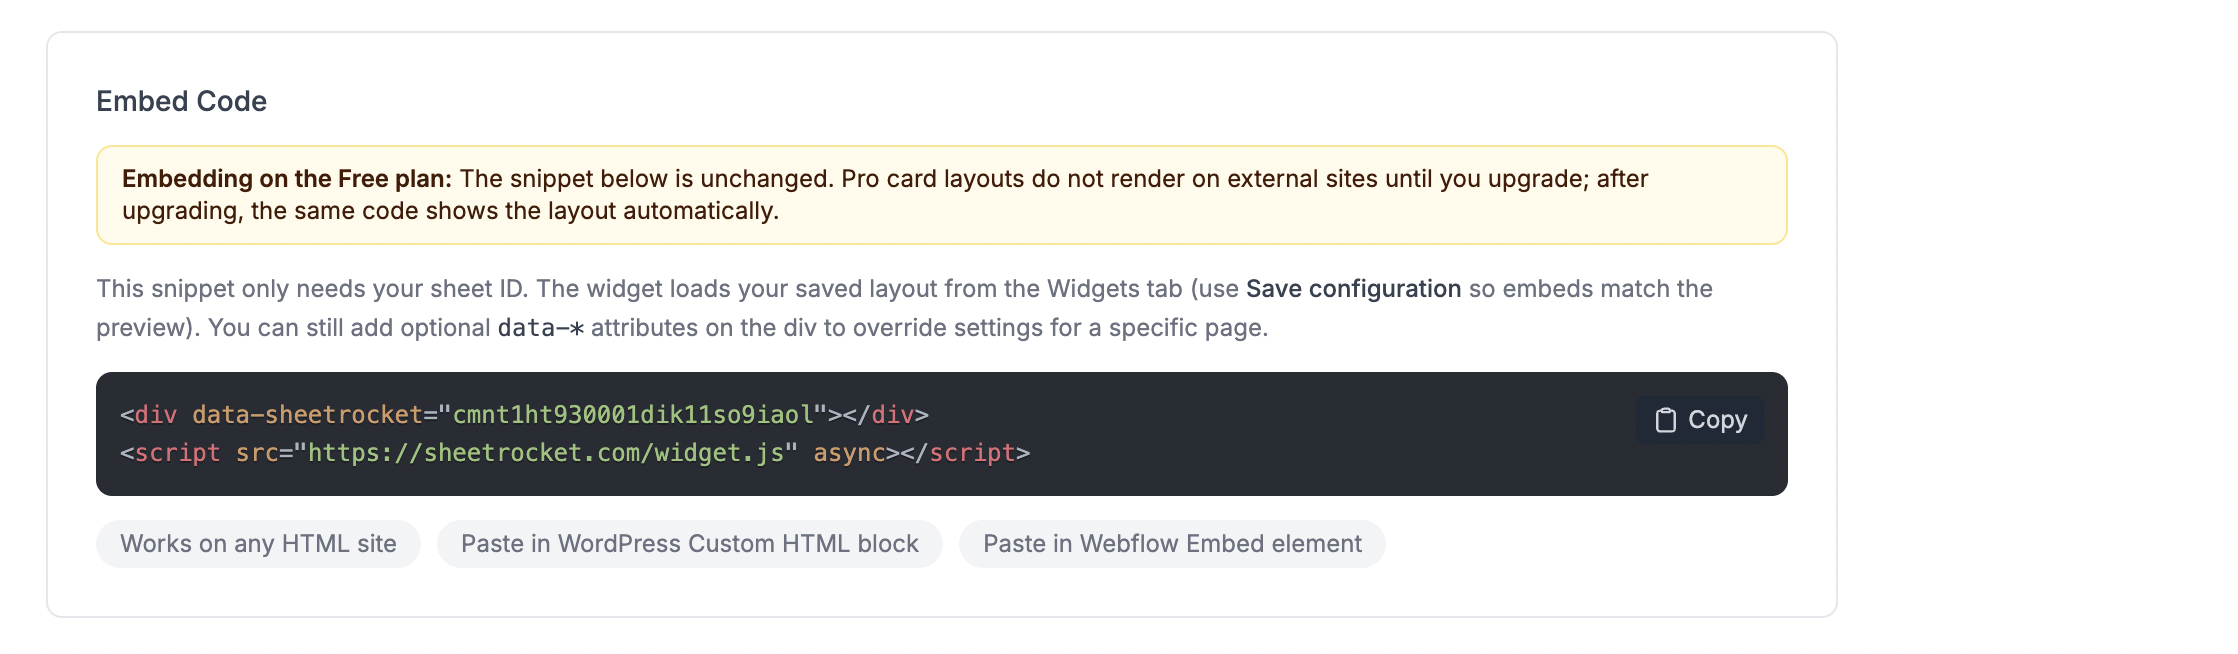
The embed code updates live as you configure the widget. The preview below shows exactly what visitors will see.
That is the entire setup. There is no Zapier zap to maintain, no slug to manage, no CMS item count to worry about, and no Webflow Editor access required for your client.
Step 6: Show the Client How to Update Content
This is the part that changes client relationships. Open the Google Sheet with your client. Show them that editing a cell and saving the sheet is all they need to do. Within seconds, the live website reflects the change.
No new software to learn. No login to a separate CMS. No calls to you asking how to add a row.
The finished result on a live Webflow site. The client updates the Google Sheet, and the page updates automatically.
Real Use Cases Where This Works Better Than Webflow CMS
Restaurant and Cafe Menus
A restaurant client changes their menu regularly. Seasonal items come and go. Prices update. Items sell out mid-service. With Webflow CMS, they would need to log in, find the right CMS item, make the change, and publish. With Sheetrocket, they open their Google Sheet, change Available to Sold Out in the Status column, and the website updates immediately. No publish step required.
Team and Staff Directories
A company's team page needs to stay current as people join and leave. The HR team already maintains a staff spreadsheet. With Sheetrocket, that spreadsheet becomes the team page. When HR updates the sheet, the website reflects it. The web designer is not in the loop for every staff change.
Event Listings and Schedules
An events page needs to show upcoming events and hide past ones. Set a row filter for Date is not empty and only filter by upcoming dates. The client adds new events as rows, and past events disappear automatically based on the filter.
Product Catalogues and Price Lists
A retail client has hundreds of products. Webflow CMS on the Business plan allows 10,000 items, but that cap starts to matter for larger catalogues. Google Sheets has no row limit that a typical small business would ever hit, and the client already manages their inventory there.
Job Boards
A company posts open roles in a Google Sheet with columns for Title, Department, Location, Type, and Status. Set the row filter to Status equals Open, and only active listings appear on the website. When a role is filled, change the status to Filled, and it disappears from the site instantly.
How This Compares to the Zapier Approach
| SheetRocket Widget | Zapier to Webflow CMS | |
|---|---|---|
| Setup time | Under 5 minutes | 30 to 60 minutes |
| Slug conflicts | Not applicable | Common problem |
| Duplicate entries | Not applicable | Common problem |
| Update speed | Instant on page load | Delayed by polling interval |
| CMS item limits | Not applicable | Yes, plan dependent |
| API deprecation risk | None | Webflow API v1 deprecated March 2025 |
| Ongoing maintenance | None | Ongoing |
| Client needs Webflow access | No | No |
| Works if Zapier is down | Yes | No |
What SheetRocket Cannot Do
It is worth being direct about the limitations so you can decide if this is the right fit for your project.
Sheetrocket widgets are rendered client-side, which means the data is not indexed by Google. If you need your content to appear in search results, blog posts, individual product pages, or SEO-driven directory listings. Webflow CMS is still the right tool because it renders server-side, and Google can index it.
Sheetrocket is the right tool for content that does not need to be indexed: menus, team directories, event schedules, price lists, and product catalogues on a page that is already indexed, and any content that changes frequently enough that the client cannot realistically manage it through a CMS.
If your content needs SEO and your client needs Google Sheets, those two requirements point toward a more complex architecture like Webflow DevLink with an external framework. For most small to medium client projects, that level of complexity is not warranted.
Getting Started
SheetRocket has a free plan that includes 1,000 API calls requests per month and 2 embeddable widgets. That is enough to set up a complete restaurant menu or team directory and show your client how it works before committing to anything.
Try SheetRocket free at sheetrocket.com
No credit card required.
Frequently Asked Questions
Will the widget look good on mobile?
Yes. SheetRocket widgets are responsive by default. The table view becomes horizontally scrollable on small screens. The cards view collapses from three columns to one column on mobile. You can also adjust font sizes and spacing in the typography customizer to match your site's mobile design.
What if my client accidentally deletes a row?
Google Sheets keeps a full version history. Your client can restore any deleted row from the Edit menu by accessing the version history. This is actually more reliable than Webflow CMS, which has no native undo for CMS item deletion.
Can I use this on a Webflow site that is already using CMS?
Yes. SheetRocket widgets and Webflow CMS are not mutually exclusive. You might use Webflow CMS for your blog posts (which need SEO) and SheetRocket for your menu or team page (which the client needs to update frequently). They coexist on the same page without any conflict.
Does the widget slow down my Webflow site?
The widget script loads asynchronously, which means it does not block your page from rendering. The data fetch happens after the page loads. For most use cases, the widget renders within one to two seconds of page load, which is acceptable for content like menus, directories, and product lists.
What if I want to show different subsets of the same sheet on different pages?
You can create multiple embed codes from the same sheet with different filters. For example, a food menu page could show only Food category items and a drinks menu page could show only the Drinks category items, both pulling from the same spreadsheet with a different row filter configurations.
Can my client see which columns are hidden?
No. Hidden columns are filtered server-side before the response is sent to the browser. If a visitor opens their browser's developer tools and inspects the network response, they will only see the columns you chose to display. Internal columns never appear.
Last updated: April 2026
Sheetrocket is built by Allen Jones, a solo founder based in Ghana, building tools that make the web more accessible for small businesses and designers who work with them.